≡ Menu
How Microchipping Protects Your New Pet

Bringing a new pet home is exciting, but it also means taking steps to protect them. At LifeEventGuide, we know that microchipping is one of the most effective ways to keep your pet safe if they ever get lost.

A microchip is a small device implanted under your pet’s skin that stores their identification information. Unlike collars or tags that can fall off, a microchip stays with your pet for life and gives you the best chance of being reunited if they wander away.

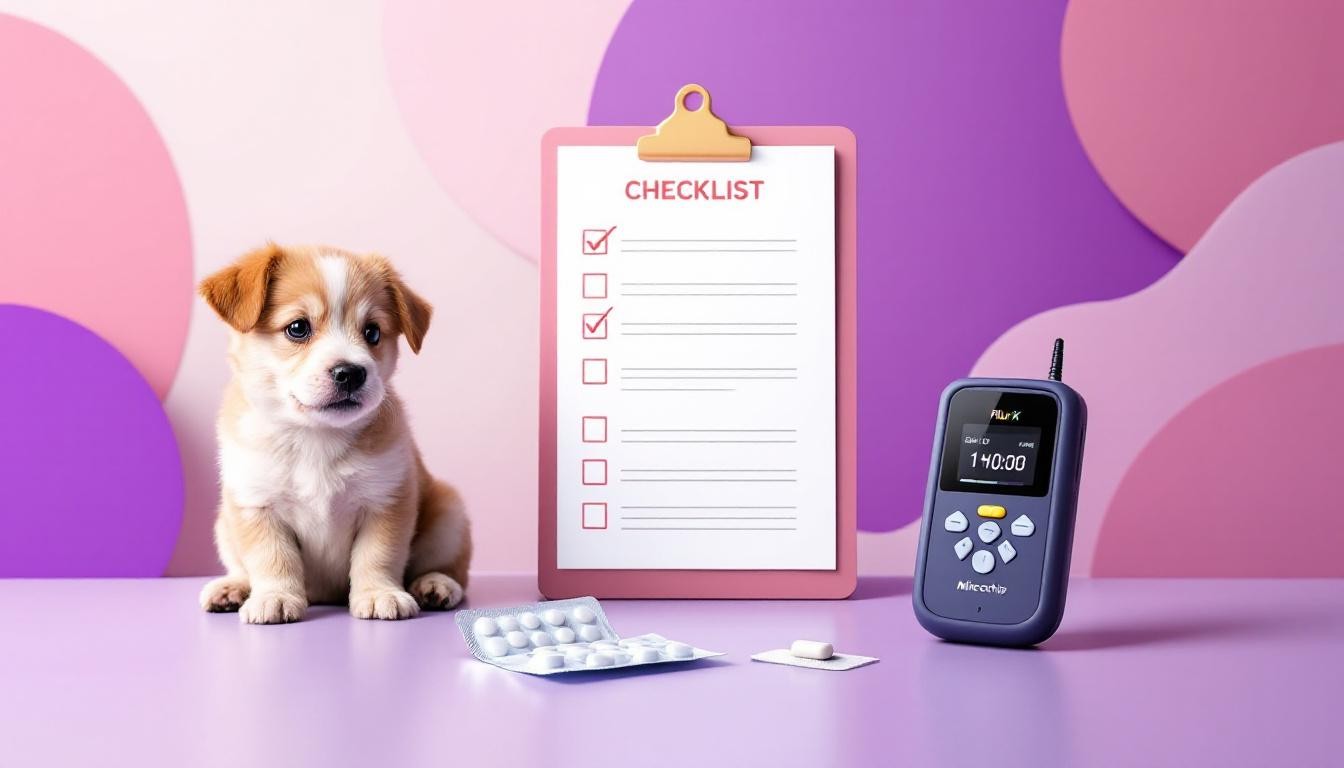
This guide walks you through everything on your pet microchip checklist, from how the technology works to why it’s worth the investment.

How Microchipping Works

Understanding the Technology

A microchip is remarkably simple: a rice-sized device about the length of a grain that sits under your pet’s skin between the shoulder blades. Inside is a 15-digit identification number and nothing else. The chip contains no battery, no GPS, and no medical data-it’s purely a passive identifier that only activates when a microchip scanner reads it. This simplicity is exactly what makes it so reliable.

The Implantation Process

The implantation takes seconds. A veterinarian uses a needle slightly larger than a standard vaccine needle to place the chip under the skin during a routine visit, and most pets experience only minor discomfort. Anesthesia is not required, though if your pet is already sedated for another procedure, the vet can implant the chip at that time. After implantation, monitor the insertion site for a few days and contact your veterinarian if you notice swelling or drainage. Once placed, the chip stays there for your pet’s entire life with zero maintenance.

Registration: The Critical Step

The implant itself is useless without registration. After your veterinarian places the chip, you receive a certificate with the chip number. That number must go into a microchip registry database along with your contact information. Microchipped dogs are returned to their owners 52% of the time-but only if the registry is current. If the registry has an outdated phone number or email, a shelter that scans your lost pet cannot reach you, and the chip becomes worthless.

Keeping Your Registry Updated

When you get your pet microchipped, ask your veterinarian which registry they use. Common providers include HomeAgain, AVID, 24PetWatch, and AKC Reunite. Some veterinary clinics auto-register chips for you, but verify this happened. If you change your phone number, move, or update your email, log into your registry account and make the change immediately. Set a reminder for August 15-Check the Chip Day-to review and update your information annually. During annual wellness exams scan chip to confirm it still reads correctly and hasn’t migrated. This simple annual check catches problems early and gives you confidence that your pet’s ID will work if needed.

Now that you understand how microchipping protects your pet through technology and registration, the next step is recognizing how this protection compares to other identification methods available to pet owners.

Why Microchipped Pets Get Found and Come Home

The Reunification Statistics That Matter

About 22 percent of lost dogs that enter animal shelters are reunited with their families, but the rate of return for microchipped dogs is more than double that rate. These numbers represent thousands of families who got their pets back because of a rice-sized implant. A lost pet wandering your neighborhood faces real danger, and microchipping is the single most reliable way to close that gap between loss and reunion.

Speed of Recovery When Your Pet Is Found

When a shelter or veterinary clinic scans a found pet, staff can contact you within hours instead of days. An outdated collar tag means nothing if your pet has been missing long enough for the tag to fall off or fade. The speed of that contact directly determines whether your pet stays safe during the critical first days after disappearance.

Permanent Identification That Stays With Your Pet

Collars fail in ways that matter. Tags get caught on branches, fade from sun exposure, or slip off during panic or struggle. A microchip implanted between the shoulder blades is inserted just beneath the skin and is minimally invasive. This permanence is why microchips also deter theft-someone who finds your pet and decides to keep it discovers the chip during a veterinary visit, immediately revealing your ownership.

Proof of Ownership That Settles Disputes

Your new pet’s microchip becomes proof of ownership that lasts their entire life without requiring any upkeep beyond keeping your registry information current. That single investment of $25 to $50 at your veterinarian’s office protects against the emotional devastation and financial cost of a lost pet far more effectively than any other identification method available today.

Understanding why microchipping works so well sets the stage for comparing it directly to other identification options you might consider for your new pet.

Why Microchipping Beats Other Pet ID Methods

The Failure Rate of Collar Tags

Collar tags fail in ways that matter most. Tags fade from sunlight, fall off during escapes, or get lost in the first weeks after you bring your pet home. When a shelter finds your pet and calls the number on the tag, staff reach a disconnected line or wrong address because you moved six months ago. The American Veterinary Medical Association found that microchipped dogs return home 52.2% of the time compared to just 21.9% for dogs without chips. For cats, the difference is even starker: a reunion rate with a microchip versus without. That gap exists because shelters can always read a microchip, but tags deteriorate and phone numbers change.

Why Tattoos Fall Short

Tattoos offer permanence but require your pet to be found by someone who knows to look for one. Faded or unclear marks become useless over time. A tattoo also doesn’t work if your pet is found by a shelter with no scanner-staff see a mark but have no way to contact you. Microchips solve this problem completely because nearly every shelter and veterinary clinic now owns a scanner, and the chip’s 15-digit ID connects directly to your current contact information in a registry database.

Speed and Reliability Under Real Pressure

The real advantage of microchipping comes down to speed and reliability when it matters most. When your pet goes missing during a thunderstorm or fireworks, they panic and shed their collar within hours. A microchip stays implanted between the shoulder blades for life, readable by any universal scanner regardless of wear or damage. The $25 to $50 upfront cost prevents the emotional devastation and search expenses that follow a lost pet.

Ownership Protection and Theft Deterrence

Your new pet’s microchip proves ownership if a dispute arises and deters theft because finders discover your ownership during a vet visit. The chip works across state lines when you relocate (something collar best practices cannot match). Microchipping is the only identification approach that consistently gets lost pets home because it combines permanence, proof of ownership, and immediate access to current contact details.

Final Thoughts

Microchipping your new pet costs between $25 and $50 at most veterinary clinics, making it one of the most affordable forms of permanent protection available. Many shelters and rescues offer discounted microchipping during adoption events, so ask about options when you bring your pet home. The investment pays for itself many times over if your pet ever goes missing, preventing the emotional devastation and search expenses that follow.

Your pet microchip checklist starts with scheduling an appointment at your veterinarian’s office to discuss implantation and registration. Ask which registry they use, confirm they will register the chip for you, and obtain the chip number on your certificate. Set a reminder for August 15 each year to verify your registration stays current and request a scan during wellness exams to confirm the chip still reads correctly.

Schedule your appointment today and take this simple step to protect your new pet. We at LifeEventGuide help you navigate major life transitions like bringing a new pet home with clear guidance and practical support. Explore our resources for pet owners to find additional tools that support you through every stage of pet ownership and other life changes.


Publisher’s Note: LifeEventGuide is an independent educational publisher. Some articles reference tools or services we recommend to help readers explore options related to major life transitions. Learn more about how we make recommendations here.

Why Adopting an Older Pet Could Be Perfect

Most people think younger pets are the better choice. At LifeEventGuide, we believe senior pet adoption offers something different-and often better.

Older pets bring calm, established personalities, lower costs, and fewer surprises into your home. They’re ready to fit into your life right now, without the chaos of training or unpredictable behavior.

What Health Advantages Come With Adopting an Older Pet

Older pets typically have lower energy levels and calmer temperaments than younger animals, which means they fit naturally into most households without constant stimulation or supervision. Senior dogs often remain active and enjoy daily walks and companionship, but they don’t require the intense engagement that puppies demand. Senior pets are often overlooked in favor of younger animals, yet older dogs and cats are typically calmer and more experienced with established routines. This stability matters for your daily life. A senior dog won’t need potty breaks every two to three hours or constant play sessions to burn energy. Instead, a seven-year-old or older dog will settle into a predictable rhythm that matches a typical family schedule.

Why Behavioral Problems Are Less Common

Older pets come with established personalities and social skills already in place. They’ve moved through the unpredictable adolescent phase where dogs test boundaries and develop unwanted habits. A senior dog arriving at your home has already learned what works and what doesn’t in a household setting. This means fewer destroyed furniture pieces, fewer accidents on carpets, and fewer surprises during your first months together. Many older dogs arrive with basic commands and house-training already complete, which significantly reduces the training burden compared to starting from scratch with a puppy. The behavioral consistency you get with an older pet isn’t luck-it’s the result of years of living in homes and learning what behavior gets positive responses.

Managing Age-Related Health Conditions

Senior dogs do face age-related health concerns including arthritis, dental disease, vision and hearing loss, and thyroid or kidney issues. However, this doesn’t mean higher costs or constant emergencies. A comprehensive wellness exam soon after adoption helps create a personalized care plan, and regular veterinary visits with annual bloodwork catch problems early when they’re easier and cheaper to manage. Many senior dogs live comfortably for years with proper support. Common age-related conditions like arthritis respond well to joint supplements, orthopedic bedding, and non-slip rugs that prevent falls. Dental disease, prevalent in older dogs, slows with regular brushing and vet-approved dental care. Weight management through appropriate portions and senior-formulated diets supports overall health.

Finding Specialized Veterinary Support

The Senior Dog Veterinary Society offers a directory to help you find veterinarians who specialize in senior pet care, ensuring your older dog receives guidance tailored to their specific needs rather than generic puppy-focused advice. A vet experienced with aging animals will catch subtle changes in appetite, mobility, or behavior that signal treatable conditions. This expertise makes a real difference in your pet’s comfort and longevity. With the right veterinary partner in place, you’re ready to set up your home to support your senior pet’s physical needs and emotional well-being.

The Real Cost Advantage of Adopting Older Pets

Lower Adoption Fees Open the Door

Adoption fees for senior pets run significantly lower than fees for puppies or young animals. Most shelters and rescues charge between $50 and $200 for senior dog adoptions, while puppies often cost $300 to $500 or more. Operation Kindness in Texas, one of the largest no-kill shelters in the country, offers reduced adoption fees specifically for senior pets to encourage more adoptions of overlooked animals. This immediate savings matters when you budget for a new family member.

Fewer Emergencies Mean Lower Veterinary Bills

Senior pets typically generate fewer veterinary emergencies than younger animals. A senior dog with an established medical history often costs less to care for than a young pet with unknown genetic predispositions or sudden injuries. You know what you’re getting with health screening completed before adoption, and your veterinarian can plan preventive care accordingly.

Young dogs suffer torn ligaments, swallowed foreign objects, and ear infections at higher rates simply because they’re more active and exploratory. Senior dogs settle into routines that reduce accident risk and emergency visits. When age-related conditions do emerge, they’re typically manageable with affordable interventions like joint supplements or dietary adjustments rather than expensive surgeries.

Personality Match Saves Money in Hidden Ways

The personality match advantage saves you money in less obvious ways. An older dog arrives with an established temperament you can evaluate before adoption, meaning you won’t spend months discovering incompatibilities or behavioral problems that require professional training or rehoming. A calm senior dog won’t destroy your furniture, chew through drywall, or create damage that forces you to replace household items. You won’t need to hire a trainer to address destructive behaviors or leash aggression. You won’t take time off work for emergency vet visits related to the chaos of puppyhood.

First-time owners particularly benefit from this stability because they avoid the hidden costs of learning pet ownership through trial and error. The predictability of a senior pet’s energy level and social skills means your home setup costs less too. You won’t need extensive baby-gating, specialized containment systems, or multiple replacement toys. The financial advantage compounds over months as you avoid the continuous expense of managing an unpredictable, high-energy young animal.

With costs controlled and personality aligned with your lifestyle, the next step involves preparing your physical space to support your senior pet’s comfort and safety.

Preparing Your Home for a Senior Pet

Create Safe Flooring and Comfortable Resting Spaces

Your home setup determines whether your senior pet settles in quickly or struggles during those critical first weeks. Senior dogs need non-slip flooring because arthritis and vision loss make slick hardwood or tile dangerous-add area rugs or carpet runners in hallways, near food bowls, and on stairs to prevent falls. Orthopedic bedding matters more for older dogs than younger ones; invest in a quality orthopedic bed with a washable, waterproof cover and a soft throw blanket for joint support. Place food and water bowls on a non-slip mat at a comfortable height so your senior doesn’t strain their neck. Install night lights in hallways and sleeping areas because senior dogs with vision loss navigate better with consistent lighting.

Modify Your Layout for Mobility and Safety

Your veterinarian can recommend specific ramps for furniture or stairs if your dog struggles with jumping, and many seniors appreciate having their sleeping area on the ground floor to avoid frequent climbing. Keep your home layout consistent-don’t rearrange furniture constantly because older dogs with hearing or vision loss rely on memory to move safely through spaces. Remove toxic plants, secure electrical cords, and block access to stairs with baby gates if climbing becomes difficult. Stock essential supplies before adoption: dental care products, grooming supplies, a carrier or crate, a leash, a suitable harness, and softer toys that are easier on aging teeth and gums.

Build Trust Through Routine and Patience

Building trust with your newly adopted senior happens through routine and patience, not through forcing interaction. The 3-3-3 rule sets realistic expectations: in the first three days your new dog will be overwhelmed with his new surroundings, the first three weeks bring routine and behavioral adjustments, and the first three months most dogs feel genuinely settled and bonded. During week one, keep your schedule predictable-feed at the same times, take walks at the same times, and maintain consistent bedtimes so your senior knows what to expect. Older dogs value stability after shelter life, and predictability builds confidence faster than spontaneous activities.

Use Positive Reinforcement and Gather Information

Use gentle, positive reinforcement training rather than corrections; senior dogs respond well to calm praise and treat rewards without the intensity younger dogs sometimes need. Contact your shelter or rescue organization with specific questions about your dog’s history, medical needs, and behavioral quirks because this information shapes how you interact during early weeks. Ask about past triggers, favorite toys, or commands your dog already knows so you can build on established skills rather than starting from scratch. Many shelters provide post-adoption support-Operation Kindness and similar rescues offer guidance, training resources, and follow-up check-ins to help adoptions succeed.

Schedule a Wellness Exam and Establish Veterinary Care

Schedule a wellness exam within the first week so your veterinarian can review the adoption paperwork, explain any age-related conditions, and create a care plan tailored to your specific dog. This visit also establishes your vet as a trusted partner for the months ahead, which matters enormously when you need advice about supplements, dietary adjustments, or behavioral changes.

Final Thoughts

Adopting a senior pet transforms your life in ways that go beyond the practical advantages we’ve covered. Senior dogs and cats offer something puppies simply can’t: immediate companionship without the chaos of training, behavioral surprises, or constant supervision. They arrive ready to settle into your home and your routine, asking only for stability, comfort, and care. Older dogs seem to understand they’ve received a second chance, and that gratitude shows in their loyalty and affection.

For your family, senior pet adoption means fewer disruptions, lower stress, and more time for the activities that matter. You avoid the financial drain of emergency vet visits, destructive behavior, and professional training. You gain a predictable companion who fits naturally into your daily rhythm, whether you’re a first-time pet owner, a busy professional, or someone seeking a calmer household.

The transition from shelter to home takes patience and planning, but the framework remains straightforward. Set up your space for safety and comfort, establish a consistent routine, and work with your veterinarian to address any age-related needs. We at LifeEventGuide offer resources and checklists to help you navigate major life transitions like pet adoption by defining goals, timelines, and key decisions so you move forward calmly and confidently. Your senior pet is waiting at a local shelter or rescue, ready to reward your kindness with years of steady, uncomplicated love.


Publisher’s Note: LifeEventGuide is an independent educational publisher. Some articles reference tools or services we recommend to help readers explore options related to major life transitions. Learn more about how we make recommendations here.

How Long Does the Adoption Process Really Take

Adoption timelines confuse many families because the process varies so much depending on where you live and which agency you work with. At LifeEventGuide, we’ve seen firsthand how unprepared families struggle with unexpected delays and missing documents that could have been avoided.

Whether you’re exploring domestic adoption, foster-to-adopt pathways, or even pet adoption timelines, understanding what to expect helps you stay organized and reduce stress. This guide breaks down realistic timeframes and shows you exactly where delays happen and how to prevent them.

How Long Does Adoption Actually Take

Adoption timelines fall into three main categories, and the differences are substantial. Foster-to-adopt moves fastest at 6 to 18 months, domestic infant adoption typically spans 1 to 7 years, and international adoption often stretches to 6 years or beyond. These aren’t arbitrary ranges-they reflect real structural differences in how each pathway works. Foster-to-adopt is quickest because parental rights termination is often already underway or complete when you begin. Domestic infant adoption takes longer primarily because finding an available newborn is the bottleneck, not the paperwork. International adoption faces the longest timeline because you must navigate two countries’ legal systems, comply with immigration requirements, and coordinate travel and visa processing that can’t be rushed.

Your First Year Sets the Pace

The initial 12 months determine whether your adoption moves forward or stalls. You’ll spend 1 to 3 months on information sessions and selecting an agency or attorney, then another 3 to 4 months completing your home study, background checks, and state clearance. The home study process involves interviews covering your family background, finances, employment, relationships, and parenting readiness. After you submit that paperwork, you enter the matching phase-and here’s where timelines become unpredictable. This phase can last anywhere from a few months to years depending on how flexible you are with preferences. Adoption expert Brenda Retrum emphasizes a hard truth: families who impose strict criteria around race, gender, or medical history face dramatically longer waits. Open attitudes toward children across racial and ethnic backgrounds, flexibility on gender, and willingness to consider children with manageable medical histories or prior substance exposure dramatically shorten your timeline. Most documents expire after one year, so if you haven’t matched by then, you’ll need to refile and potentially restart parts of the process.

State Laws and Agency Processes Create Real Delays

Your state matters more than you might think. Interstate placements trigger ICPC processing, which adds administrative steps. State consent timing rules also affect when adoption can proceed-some states require 72 hours after birth before consent is valid, while others mandate 30 days or longer. Post-placement supervision requirements vary by state too, ranging from 1 to 18 months before finalization. The finalization hearing itself is brief, usually 10 to 30 minutes, but scheduling that hearing depends on your court’s calendar. If your court has backlogs, you wait. An experienced agency or attorney who understands your specific state’s requirements prevents surprises. For international adoption, country processing times vary wildly-China averages 4 to 5 years, while Ukraine or Mexico might take 3 to 6 months. USCIS Orphan Visa processing adds another 5 days to 5 months on top of that.

How Flexibility Shapes Your Timeline

The single most powerful factor you control is your flexibility. Families willing to consider children across different racial and ethnic backgrounds, open to either gender, and prepared for manageable medical or behavioral needs access a much larger pool of available children. This expanded pool translates directly into shorter waits. Conversely, strict preferences (particularly around race or gender) cut your available matches in half or more, extending your timeline significantly. Budget also matters-larger available funds or access to adoption grants and loans expand your options and can accelerate your path forward. Your willingness to work with multiple agencies or networks increases exposure to potential matches, which speeds the process considerably.

Preparation Prevents Unnecessary Delays

Understanding these specific constraints lets you prepare documents early, budget appropriately, and set realistic expectations with your family. Start your home study as soon as possible and stay organized with paperwork submission. Missing documents or incomplete applications create avoidable delays that can extend your timeline by months. Work with an experienced professional who knows your state’s specific requirements and can guide you through each phase. The adoption process moves at its own pace, but you control how prepared you are when opportunities arise.

What Happens During Each Stage of Adoption

The Home Study Sets Your Foundation

The home study arrives first and controls everything that follows. This phase typically runs 3–6 months from start to completion, though some families finish in as little as 6 weeks if they submit documents promptly and their circumstances are straightforward. The home study isn’t a pass-or-fail inspection-it’s a detailed assessment that covers your family background, employment stability, finances, relationships, criminal history, and parenting capacity. A social worker tours your living space, interviews you and your household members separately, and reviews your references. Background checks run simultaneously and include FBI clearance, state criminal records, child abuse and neglect registry checks, and sex offender registry searches. These checks vary by state but generally take 4 to 8 weeks.

The single actionable step that accelerates this phase is submitting all requested documents within 48 hours of receiving the request list. Families who delay document submission-sending items piecemeal over weeks-add months to their timeline. Gather financial statements, employment letters, medical records, and reference contact information before you formally start the home study process. This preparation alone can compress your timeline by 4 to 6 weeks.

The Matching Phase Tests Your Patience and Flexibility

Once your home study receives approval and documents are filed, you enter the matching phase, which is where timelines become genuinely unpredictable and emotionally taxing. Your flexibility determines speed here, and many families encounter their first serious delays during this stage. For domestic infant adoption, this phase can last 6 months to several years depending entirely on birth parent preferences and agency processes. Adoption expert Brenda Retrum notes that families experience an emotional roller coaster during this waiting period-moments of excitement when a potential match appears, followed by disappointment when birth parents choose another family.

If you pursue foster-to-adopt, the matching phase typically occurs within 1–12 months of approval. For international adoption, country processing begins here and dominates your timeline. A child from Bulgaria might match within 1 to 2 years, while adoptions from China can take anywhere from 9 months to several years depending on your matching timeline. Your willingness to consider children across different racial and ethnic backgrounds, openness to either gender, and readiness for manageable medical or behavioral needs expand your available pool significantly and shorten your wait.

Placement, Supervision, and Finalization Complete the Journey

After a match occurs, you enter placement and transition, which typically lasts 1 to 6 months before you petition the court for adoption. Post-placement supervision follows, ranging from 1 to 18 months depending on your state and adoption type. The finalization hearing concludes this stage and is remarkably brief-usually 10 to 30 minutes-but scheduling depends on your court’s calendar. If your court has significant backlogs, you could wait several months for that final hearing even though the hearing itself takes minutes.

An experienced adoption attorney or agency prevents surprises here by providing your state’s specific post-placement requirements and court scheduling patterns upfront. These professionals understand how delays occur at each stage and position you to move forward efficiently. With your home study complete, your matching phase underway, and your legal pathway clear, the next critical factor becomes understanding what actually slows families down and how to sidestep those obstacles entirely.

What Causes Adoption Delays and How to Stop Them

Missing Paperwork Costs You Weeks or Months

Missing paperwork is the adoption delay that families actually control, and most never realize how critical this is. When you receive a document request list from your agency or attorney, submit everything within 48 hours. This compresses your timeline by weeks or months compared to families who send items piecemeal over several weeks. Background checks, financial verification, employment letters, and medical clearances all require time to process, but your response speed determines whether those processes run in parallel or sequentially.

A family that submits incomplete paperwork forces their caseworker to follow up, wait for responses, and restart processing. Most families complete the home study within 3 to 4 months with steady communication and preparation. If your home study requires three separate background check clearances and you submit them all at once, they process simultaneously. If you submit them one at a time across several weeks, you’re looking at significantly longer timelines. This difference compounds across every document phase, and by the time you reach the matching phase, disorganized families have already lost considerable time.

Your state also requires annual document renewal if your adoption hasn’t finalized within 12 months, which means incomplete or delayed submissions during your first year force you to refile everything and restart the entire process from scratch.

Court Backlogs and Scheduling Delays

Court backlogs present a different problem because they’re largely outside your control, but your attorney can mitigate this by knowing your specific court’s calendar patterns and scheduling your finalization hearing months in advance rather than filing it at the last minute. Court backlogs for adoption finalization hearings vary significantly by location. In most adoptions, the final adoption hearing occurs around six months after placement, although some hearings can happen as little as three months or up to longer timelines depending on your jurisdiction. An experienced local attorney knows this reality and plans accordingly.

International adoptions face country-specific processing delays that vary dramatically. China’s process averages 4 to 5 years partly because of government processing timelines you cannot influence, while Ukraine or Mexico process cases in 3 to 6 months. USCIS Orphan Visa processing can take anywhere from 5 days to 5 months depending on application completeness and staffing levels at your local office.

Unexpected Complications During Placement

Unexpected complications during placement-a child’s medical needs requiring additional evaluations, birth parent contact arrangements taking longer than anticipated, or ICPC processing delays for interstate placements-add time you didn’t anticipate. These complications are real but manageable if you work with professionals who’ve navigated them before. An attorney or agency that handles multiple adoptions annually knows which complications appear in your specific state and prepares you for them upfront rather than leaving you surprised when they occur.

How to Prevent Delays You Control

The practical action that prevents most delays is starting your home study immediately and staying organized with document submission. Gather financial statements, employment verification letters, medical records, and reference contact information before you formally begin the process-don’t wait for your caseworker to request them. This preparation compresses your home study timeline toward the faster end of typical timelines if your circumstances are straightforward and your documents are already assembled.

Hire an experienced local attorney or work with an agency that specializes in your adoption type and knows your state’s specific requirements, court backlogs, and processing patterns. Build flexibility into your preferences from day one because strict criteria around race, gender, or medical history directly extend your matching timeline-sometimes by years. Families willing to consider children across different racial and ethnic backgrounds and open to either gender access a significantly larger pool of available children, which means faster matches and shorter overall timelines.

Understand that some delays are structural and unavoidable, which is why setting realistic expectations with your family prevents emotional crisis when your timeline extends beyond your initial estimate. The adoption process moves at its own pace, but the delays you can control-paperwork organization, document submission speed, and preference flexibility-account for the majority of timeline variation between families pursuing the same adoption pathway.

Final Thoughts

Adoption timelines range from 6 months to 6 years or beyond, depending on your pathway and circumstances. Foster-to-adopt moves fastest, domestic infant adoption takes longer, and international adoption requires the most patience. You control more of your timeline than you might think through preparation, document submission speed, and flexibility on preferences. Your home study completion in 3 to 4 months versus 6 months depends entirely on whether you submit documents within 48 hours of receiving requests and gather financial statements and employment letters before you formally begin. Families willing to consider children across different racial and ethnic backgrounds and open to either gender access a much larger pool of available children, which translates directly into shorter waits. Strict preferences around race or gender cut your available matches in half or more, extending your timeline by months or years.

An experienced local attorney or agency that specializes in your adoption type and knows your state’s specific requirements positions you to move forward efficiently. These professionals understand where delays occur and help you set realistic expectations with your family, which prevents emotional crisis when your timeline extends beyond your initial estimate. They also guide you through the same principles that apply to other major life transitions, whether you’re navigating a pet adoption timeline or managing other significant changes.

At LifeEventGuide, we help families navigate major life changes by defining clear goals, timelines, and budgets. Our Decide-Protect-Execute-Review framework guides you through each phase with practical checklists that prevent common mistakes. Moving forward with confidence means understanding what to expect, preparing thoroughly, and staying flexible when circumstances shift.


Publisher’s Note: LifeEventGuide is an independent educational publisher. Some articles reference tools or services we recommend to help readers explore options related to major life transitions. Learn more about how we make recommendations here.

What Mechanics Check During Vehicle Inspections

A pre-purchase inspection car check reveals what’s really going on under the hood before you commit to buying. Whether you’re shopping for your first vehicle or your fifth, knowing what mechanics look for helps you make smarter decisions.

At LifeEventGuide, we break down the key systems mechanics examine so you understand exactly what’s being tested and why it matters for your safety and wallet.

What Mechanics Check in Your Engine and Fluid Systems

Oil Level and Condition

Engine oil sits at the top of any mechanic’s inspection list because it’s the lifeblood of your vehicle. A mechanic will pull the dipstick to check both the level and the condition of the oil. Fresh oil appears amber or light brown, while dark, thick, or gritty oil signals that your engine hasn’t been properly maintained or that internal wear is happening. If the oil smells burnt or looks black, that’s a red flag. Regular oil changes rank among the most important maintenance tasks, yet many vehicle owners skip them. The inspection reveals whether previous owners followed the manufacturer’s recommended oil change intervals. Low oil levels combined with no visible leaks underneath the car suggest internal engine problems that could cost thousands to repair.

Coolant System Health

Coolant gets immediate attention because it directly impacts whether your vehicle will run reliably. The coolant should be bright green, orange, or pink depending on the vehicle type, and it should fill the radiator to the marked line when the engine is cold. Cloudy or rusty-colored coolant indicates corrosion inside the cooling system, which means the radiator and engine block may already be suffering damage. A mechanic will also check that the radiator fans spin freely and that hoses show no cracks or soft spots. This simple check prevents expensive repairs later.

Transmission Fluid Assessment

Transmission fluid is where condition matters even more than level. Red or pink transmission fluid in good condition indicates proper operation, but burnt-smelling, dark, or brown fluid signals that the transmission has been overheating or is experiencing internal wear. Transmission problems often emerge gradually, and catching fluid degradation early during an inspection can save you from costly repairs down the road. If the mechanic finds that transmission fluid is low but there are no visible leaks, it suggests the transmission is consuming fluid internally, which points to seal failure or other serious issues that require immediate attention.

With the engine and fluid systems evaluated, a mechanic shifts focus to the components that keep your vehicle stopping and handling safely-the brake and suspension systems.

Brake and Suspension Systems

Brakes are non-negotiable during any vehicle inspection because they directly determine whether you stop safely. A mechanic checks brake pad thickness first-pads should measure at least 1/4 inch thick, though many mechanics recommend replacing them once they drop below 3/8 inch to avoid rotor damage. Worn brake rotors develop grooves or warping that causes pulsation when you brake, and resurfacing or replacing them adds significant cost to your repair bill.

Brake Fluid and Pad Assessment

The mechanic inspects brake fluid, which should be clear or slightly amber; dark, cloudy, or moisture-contaminated fluid indicates water has entered the system and compromised braking performance. Brake fluid absorbs moisture over time, which lowers its boiling point and can cause brake fade during hard stops. According to AAA, proper brake maintenance prevents unexpected failures and keeps your stopping distance consistent. If a mechanic finds that brake pads wear unevenly-thicker on one side than the other-it signals alignment problems or caliper issues that need correction. Low brake fluid without visible leaks underneath the vehicle means the system has an internal leak, often at wheel cylinders or calipers, and the brakes may fail without warning.

Suspension Alignment and Component Wear

Suspension problems often go unnoticed until they become dangerous, yet they appear clearly during inspection. A mechanic checks shock absorbers and struts for leaks and listens for clunking sounds that indicate worn bushings or ball joints. Uneven tire wear patterns reveal suspension misalignment-edges wearing faster than the center suggests over-inflation or worn components, while center wear indicates under-inflation. According to NHTSA, proper suspension alignment improves handling, prevents premature tire failure, and affects your safety in emergency maneuvers.

Steering and Spring Integrity

A mechanic assesses steering play by turning the wheel with the engine off; excessive looseness before the wheels respond signals worn tie rods or steering components that require replacement. Springs that sag visibly on one corner indicate a failed coil spring, which affects ride height and handling. During a test drive, the mechanic evaluates how the vehicle bounces after hitting a bump-excessive bouncing or multiple oscillations mean shocks are worn and can’t control suspension movement properly. Addressing suspension issues promptly prevents accelerated tire wear and maintains your vehicle’s handling characteristics, setting the stage for the electrical and safety systems that complete a thorough inspection.

Electrical Systems and Tires

Battery Health and Charging System

Electrical failures strand vehicles faster than almost any other problem, yet many inspections miss early warning signs until the battery dies or lights flicker at night. A mechanic tests battery health by measuring cold cranking amps, which define a battery’s ability to start or crank an engine in cold temperatures and should meet the vehicle’s specification. Terminal corrosion appears as white, blue, or green crusty buildup around battery posts, and this corrosion prevents proper electrical flow even when the battery itself tests fine. The mechanic cleans terminals and verifies the alternator charges at the correct voltage, typically 13.5 to 14.5 volts while the engine runs. A failing alternator leaves you stranded because the battery won’t recharge while driving.

Lighting and Visibility

All exterior and interior lights receive attention during inspection-headlights that shine dimly compared to each other signal a charging problem or corroded connections, while burned-out brake lights or turn signals create safety hazards and legal violations. The mechanic tests wipers across the full windshield to confirm they clear without streaking, and checks that the windshield itself has no cracks wider than a quarter inch in the driver’s line of sight, since larger cracks impair visibility and fail inspection in most states.

Tire Tread and Wear Patterns

Tires demand serious scrutiny because they’re your only contact with the road, and worn tires fail to grip properly in wet conditions or emergency maneuvers. A mechanic measures tread depth using the penny test-inserting a penny upside down into the tread groove should show the top of Lincoln’s head covered by rubber, indicating at least 2/32 inch of tread remaining, which is the legal minimum in all states. However, worn tires at 2/32 inch perform poorly in rain, and wet braking distance increases significantly compared to tires at 4/32 inch, so many mechanics recommend replacement before you hit legal limits.

Sidewall Condition and Tire Age

Uneven wear patterns reveal underlying problems that inspection alone won’t fix-inner edge wear suggests over-inflation or suspension misalignment, outer edge wear indicates under-inflation, and center wear means the tire runs too hot from excessive pressure. The mechanic inspects sidewalls for cracks, bulges, or puncture repairs, since sidewall damage can cause blowouts at highway speeds. Tire age matters too, and tires older than five years should be replaced regardless of tread depth because rubber hardens and loses grip over time. The spare tire receives a quick inspection to confirm it holds air and matches the vehicle’s other tires in type, since mismatched spares can damage the transmission in all-wheel-drive vehicles.

Final Thoughts

A pre-purchase inspection car check reveals far more than most buyers expect. Mechanics systematically evaluate your engine’s reliability, your brakes’ stopping power, and your electrical systems’ function. They measure tire tread, assess fluid conditions, and listen for sounds that signal hidden problems-all of which protects both your safety and your wallet.

Regular vehicle maintenance prevents many inspection failures before they occur. Oil changes protect your engine, brake fluid flushes maintain stopping power, tire rotations extend tread life, and suspension checks prevent handling issues. When you stay on top of maintenance, inspections confirm your vehicle is in good shape rather than reveal costly surprises.

We at LifeEventGuide understand that major purchases like vehicles involve significant decisions and timelines. Our guides for life transitions help you navigate major purchases with clear frameworks that reduce risk and build confidence.


Publisher’s Note: LifeEventGuide is an independent educational publisher. Some articles reference tools or services we recommend to help readers explore options related to major life transitions. Learn more about how we make recommendations here.

Why Extended Warranties Matter for Used Cars

Buying a used car comes with uncertainty. You don’t know its full history, and unexpected repairs can drain your savings fast.

An extended warranty can protect you from those surprise costs. At LifeEventGuide, we help people understand warranty coverage for cars so they can make informed decisions about their purchase.

What Extended Warranties Actually Cover

Extended warranties for used cars protect specific mechanical and electrical systems, but the coverage varies significantly depending on which plan you choose. The most comprehensive option is bumper-to-bumper coverage, which covers all of a vehicle’s components for a set period of time or number of miles. Powertrain warranties are more affordable and cover the engine, transmission, and some drivetrain components-the parts most likely to fail on a used car. According to Kelley Blue Book data, the national average repair cost sits at $838, but major repairs run much higher: fuel pump replacement costs between $1,125 and $1,247, while fuel injector replacement ranges from $1,127 to $1,251. A powertrain warranty shields you from these substantial bills. Drivetrain warranties focus narrowly on the transmission, driveshaft, and axles, excluding the engine entirely, so they work best if your primary concern is transmission failure rather than engine problems.

What Gets Excluded from Coverage

Most extended warranties explicitly exclude normal wear and tear, routine maintenance, accidents, theft, and improper vehicle modifications. This matters because many people assume their warranty covers everything mechanical. It doesn’t. Electrical system repairs fall under powertrain coverage in some plans but not others-confirm this before purchasing because electrical work on modern used cars can be expensive. Emission-related components like catalytic converters and oxygen sensors warrant special attention, especially on older vehicles, since emission system repairs can cost hundreds of dollars and may not be covered under standard powertrain plans. Corrosion warranties exist as a separate option and cover rust damage, which becomes increasingly valuable if you live in areas with high humidity or road salt exposure. The best approach is to request a detailed breakdown of what’s covered and specifically ask about electrical systems, emissions components, and corrosion before committing to any plan.

Comparing Coverage to Your Actual Repair Risk

The real value of an extended warranty depends on matching coverage to your specific car’s reliability record. Check Consumer Reports’ reliability ratings for your exact make and model before deciding on coverage type. If you purchase a vehicle with below-average reliability or plan to keep the car beyond 80,000 miles, powertrain coverage becomes increasingly sensible. Typical extended warranties cost roughly $110 to $150 per month, so a three-year powertrain plan runs between $3,960 and $5,400-expensive upfront but potentially worthwhile if your used car requires even two major repairs during that period. Understanding these numbers helps you move forward with confidence into the financial realities of warranty ownership.

Does an Extended Warranty Actually Save You Money?

An extended warranty protects your budget when major repairs strike, but the math matters more than the marketing pitch. The national average car repair costs $838 according to Kelley Blue Book, yet individual repairs routinely exceed this figure by multiples. A fuel pump replacement runs $1,125 to $1,247, an alternator swap costs $754 to $850, and a transmission issue can push well into the thousands. If your used car needs just two significant repairs during a three-year ownership period, you’ve likely recovered the $3,960 to $5,400 cost of a typical powertrain warranty. The real question isn’t whether warranties sound like a good idea-it’s whether the specific car you own actually needs one based on its repair history and reliability track record.

Calculate Your Repair Risk Before Buying Coverage

Start with Consumer Reports’ reliability ratings for your exact make and model, then cross-reference that information against actual repair costs you might face. A Honda Civic with above-average reliability might never need a major repair, making warranty spending wasteful. A Jaguar XF showing moderate risk, while a Tesla Model 3 indicates higher exposure. Your decision hinges on three factors: vehicle age and mileage, your annual driving distance, and whether you can absorb a $1,500 to $3,000 repair bill without financial strain. If you drive 15,000 miles annually and plan to keep the car for five years, you face greater repair probability than someone driving 8,000 miles yearly who intends to sell after three years. Higher-mileage vehicles and those with below-average reliability ratings shift the financial advantage toward warranty protection, while newer used cars with strong reliability records often don’t justify the expense.

Negotiate Warranty Costs Like You Negotiate the Car Price

Extended warranty costs are negotiable-treat them like the car’s purchase price and ask for better terms. A $150 monthly premium can sometimes drop to $120 with negotiation, saving you $1,080 over three years. Compare this against your specific repair risk: if your vehicle model averages $2,000 in repairs over five years, a $4,500 warranty doesn’t make financial sense. However, if your model averages $4,500 or more, the warranty becomes genuinely protective.

Consider Self-Insurance as Your Alternative

Some owners skip warranties entirely and fund a dedicated repair savings account instead, contributing $125 monthly into a separate account that functions as self-insurance. This approach works only if you genuinely commit to the savings discipline and can tolerate the uncertainty of not knowing when repairs arrive. Others prefer the predictability of a fixed monthly warranty cost over the randomness of repair bills, and that psychological comfort carries real value for people managing tight household budgets. Your tolerance for financial uncertainty ultimately determines whether a warranty or a repair fund serves you better-and that decision sets the stage for evaluating the specific mistakes that trap many used-car buyers.

Warranty Mistakes That Cost You Money

Most people buying extended warranties fall into three traps that undermine the entire protection strategy. The first trap occurs when you sign without understanding what’s actually covered, which happens because warranty documents deliberately bury critical details in dense legal language. Consumer Reports has found that extended warranties are often overpriced, with members paying far more for coverage than they receive in benefits, largely because they don’t comprehend the exclusions before purchasing.

Request a Plain-English Coverage Summary

You need to request a plain-English summary that lists exactly what’s covered and what’s explicitly excluded, then ask the dealer or provider to explain any terms you don’t understand. Specifically ask whether electrical repairs, transmission issues, engine problems, and emission-system components are included, since these vary wildly between plans. If the provider won’t give you clear answers, walk away-legitimate warranty companies make their coverage transparent because they want informed customers, not disputes later.

Identify Overlapping Coverage with Existing Plans

The second trap involves purchasing coverage that overlaps with what you already have, which wastes money immediately. If you’re purchasing a certified pre-owned vehicle with a remaining manufacturer’s warranty, adding a bumper-to-bumper extended plan creates redundant protection during overlapping months. Check your manufacturer’s warranty documentation carefully to understand what’s already covered. You’ll pay twice for the same protection during those overlapping months, money that could reduce your deductible or extend your coverage period instead.

Avoid Unnecessary Add-Ons That Pad Your Bill

The third trap is purchasing add-ons you’ll never use. Roadside assistance, rental car reimbursement, and tire protection sound valuable until you realize you already have roadside assistance through your auto insurance or credit card, or that rental car reimbursement caps at $30 daily when local rental shops charge $60 or more. Before accepting any add-ons, verify whether your existing insurance or memberships already provide these services. Negotiate the base warranty price down rather than stacking expensive add-ons that pad the dealer’s commission. A $4,000 powertrain plan with $800 in unnecessary add-ons costs you $800 more for protection you won’t claim, money better spent lowering your deductible or negotiating a better warranty term.

Final Thoughts

Evaluating warranty coverage for a car requires you to balance three realities: your vehicle’s actual reliability, the cost of potential repairs, and your personal comfort with financial uncertainty. Start by checking Consumer Reports’ reliability ratings for your specific make and model, then compare those findings against real repair costs from Kelley Blue Book data. A fuel pump replacement at $1,125 to $1,247 or a transmission issue costing thousands becomes less frightening when you’ve already calculated the probability of needing that repair.

If your used car shows below-average reliability or you plan to keep it beyond 80,000 miles, warranty coverage for the car’s powertrain components makes financial sense. If your vehicle has strong reliability ratings and you’re only keeping it three years, skipping the warranty and funding a dedicated repair savings account might serve you better. The decision ultimately depends on whether you value predictability over uncertainty, since a fixed monthly warranty cost removes the stress of surprise repair bills while self-insurance offers flexibility and potential savings.

Before you commit to any plan, request a plain-English coverage summary that clearly lists what’s included and excluded, verify you’re not duplicating existing manufacturer’s warranty protection, and negotiate the price like you would the car itself. Walk away from any provider unwilling to answer your questions directly or who pressures you into unnecessary add-ons. Visit our car buying resources to explore guides that support your warranty decisions with confidence.


Publisher’s Note: LifeEventGuide is an independent educational publisher. Some articles reference tools or services we recommend to help readers explore options related to major life transitions. Learn more about how we make recommendations here.

Should You Consider an Electric Car in Your Next Purchase

Buying a car is one of the biggest decisions you’ll make, and electric vehicles are changing what that choice looks like. We at LifeEventGuide created this electric vehicle guide to help you understand whether an EV makes sense for your life right now.

The numbers matter here: battery costs have dropped 89% since 2010, and EVs now make up over 14% of new car sales globally. This guide walks you through the real costs, charging realities, and whether an electric car fits your driving habits.

Understanding How Electric Vehicles Work

Electric vehicles operate on a fundamentally different principle than gas cars, and understanding this matters for your decision. Instead of an internal combustion engine burning fuel, EVs use a rechargeable battery pack that powers an electric motor. That battery pack consists of thousands of individual cells-a Tesla Model S, for example, contains roughly 7,104 battery cells working together. The battery management system continuously monitors temperature, charge level, and cell health to optimize performance and longevity. Most EVs come with an 8-year or 100,000-mile battery warranty, and some manufacturers offer longer coverage, which shows manufacturers stand behind their battery technology. The electric motor delivers power instantly, which is why EVs accelerate quickly from a stop compared to most gas vehicles. This instant torque can surprise new drivers, so if you’re switching from a gas car, expect a different feel from the moment you press the accelerator.

The Three Types of Electric Vehicles

The market now offers three main categories, and the right choice depends on your charging access and driving patterns. Battery electric vehicles, or BEVs, run entirely on electricity and produce zero tailpipe emissions. They represent the most common type you’ll see today, with models like the Hyundai Ioniq 6 and Kia EV4 offering affordable options in the high-$30,000 range. Plug-in hybrids, or PHEVs, combine an electric motor with a gasoline engine and typically offer 20 to 50 miles of electric range before the gas engine kicks in. PHEVs work well if you’re hesitant about charging infrastructure or take frequent long road trips. Standard hybrids, or HEVs, use a gas engine with electric assist but cannot be plugged in and don’t offer the fuel savings of true electric driving. If charging access remains uncertain where you live or work, a PHEV serves as a practical stepping stone before committing fully to electric.

Real Range and Battery Performance in Daily Life

Modern EVs now offer real-world ranges starting at roughly 200 miles per full charge, with many models exceeding 300 miles and premium options reaching around 512 miles. However, the range you actually experience varies significantly with weather, terrain, and driving habits. Cold weather can reduce range substantially, so if you live in a northern climate, try models with heat pumps and battery thermal management systems to maximize efficiency. The 2025 Hyundai Ioniq 6 uses about 25 kilowatt-hours per 100 miles, while the Kona Electric uses about 29 (according to Department of Energy data). These efficiency differences matter over time because they directly affect your charging costs and how often you need to recharge. EVs use 2.6 to 4.8 times less energy per mile than traditional gas vehicles. Battery degradation happens gradually-most batteries retain 80% to 90% of their capacity after 200,000 miles-so your range won’t drop off suddenly. If you’re considering a used EV, always check the current battery capacity and remaining warranty before purchasing, as battery health varies by age and usage patterns.

What This Means for Your Next Steps

The technical foundation of an EV differs significantly from what you may know about gas cars, but this difference translates into real advantages for your wallet and driving experience. Understanding how batteries work, what warranty coverage protects you, and how range performs in your climate sets you up to make an informed choice. With this foundation in place, the next question becomes whether the financial picture makes sense for your situation-and that’s where the numbers reveal whether an EV truly fits your budget.

The Real Cost of Switching to Electric

An EV typically costs more upfront than a comparable gas car, but the long-term financial picture tells a different story. According to recent data, the gap with gas cars shrinks to $6,500. Federal tax credits up to $7,500 for new EVs and up to $4,000 for used ones narrow that gap immediately, and many states layer on additional rebates that can shave thousands more off your purchase price. The real advantage emerges over time through fuel and maintenance savings. EV owners spend roughly $485 per year on electricity compared to $1,117 annually for gas drivers. According to AAA data, charging costs roughly $47 per 1,000 miles versus $111 per 1,000 miles for gasoline. Maintenance costs run about 40% lower per mile because EVs have no oil changes, spark plugs, or transmission fluid to service, and regenerative braking reduces wear on brake pads.

Atlas Public Policy research conducted in 2025 for the Natural Resources Defense Council found EV ownership cheaper than gas cars in 4 of 5 vehicle categories over roughly seven years, with the Chevy Equinox EV and Tesla Model Y showing particularly strong savings. Your regional electricity rates matter significantly here. Drivers in Washington state can save up to approximately $14,480 over 15 years, while drivers in Hawaii face different economics due to higher electricity costs. The Department of Energy’s fuel-savings calculator lets you model the true cost difference for your specific vehicle choice and driving patterns rather than relying on general estimates.

Home Charging Saves the Most Money

Home charging is where most EV owners save money, yet many people underestimate its importance to their financial picture. Level 2 home charging (240-volt) can provide over 250 miles of range overnight and typically costs $1,000 to $2,500 to install, making it a one-time investment that pays for itself quickly. Charging during off-peak hours through time-of-use electricity rates can reduce your costs by roughly 30% per charge, so ask your utility about available programs. Public DC fast charging costs significantly more per kilowatt-hour than home electricity, which is why relying primarily on public chargers erodes the financial advantage of EV ownership.

If you lack reliable home or workplace charging, a plug-in hybrid with 20 to 50 miles of electric range becomes more practical than a full battery electric vehicle because it lets you capture daily electric savings while avoiding range anxiety on longer trips. Most daily driving happens on home electricity overnight, not through public networks. If you live in an apartment or cannot install a Level 2 charger at home, carefully assess whether your workplace or nearby public networks make EV ownership feasible before committing to the purchase.

Map Your Charging Network Before Purchase

Charging availability directly impacts whether an EV fits your lifestyle, so this deserves serious attention before purchase. Map out chargers along your typical routes using networks like Electrify America, ChargePoint, and PlugShare to compare plug types, speeds, and pricing in your area. DC fast charging networks are expanding, and many automakers now support Tesla’s NACS connector, which gives non-Tesla drivers access to the Supercharger network. However, charging infrastructure reliability remains inconsistent-real-world data show some chargers malfunction regularly, so don’t assume every station you locate will work when you need it.

For road trips, plan multiple charging stops across different networks to minimize wait times and maximize flexibility if one charger fails. Your vehicle’s maximum DC charging rate matters here too. Not all EVs support the highest charging speeds available, so verify that your specific model can take advantage of 150-kilowatt or faster charging if you plan frequent long-distance travel. Urban commuters needing 150 to 250 miles per charge have abundant public options, suburban families wanting 250 to 350 miles benefit most from home charging, and road-trippers requiring 350-plus miles need both reliable home charging and mapped public networks before purchase.

With your financial picture and charging infrastructure mapped out, the next step involves understanding how an EV actually performs on the road and what maintenance looks like over time-factors that directly shape whether this investment makes sense for your household.

How EVs Actually Perform and What Maintenance Really Looks Like

The Driving Experience Sets EVs Apart

Electric motors deliver maximum torque instantly, which means even modestly priced EVs accelerate from a stop faster than most gas-powered sedans. This instant power response takes adjustment if you’re coming from a traditional engine, and test-driving one reveals the difference immediately. The quiet cabin at highway speeds becomes noticeable right away-EVs operate nearly silently compared to the constant engine noise of gas cars, which many owners find reduces fatigue on longer drives. The acceleration and silence combine to create a fundamentally different experience that appeals to drivers seeking a smoother, more refined ride.

Environmental Impact Improves With Cleaner Grids

The environmental case for EVs strengthens as regional electricity grids shift toward renewable sources. EV emissions vary across the United States based on local electricity generation. In regions like Washington or California with cleaner grids, an EV produces significantly lower lifetime emissions than a gas car. Even in regions relying more heavily on fossil fuels, EVs still generate roughly half the emissions of comparable gas vehicles over their lifetime because electric motors operate at much higher efficiency than internal combustion engines. The Department of Energy confirms that 87 to 91 percent of electrical energy reaches the wheels in an EV, compared to just 16 to 25 percent in gas cars where most energy escapes as heat.

Maintenance Costs Drop Dramatically

Maintenance differences matter more than many people realize, and this is where EVs deliver concrete year-after-year savings. There are no oil changes, spark plugs, transmission fluid flushes, or timing belt replacements to schedule. Regenerative braking captures energy when you slow down and feeds it back to the battery, which means brake pads wear far more slowly-some EV owners report pads lasting 200,000 miles or longer. Tires still wear normally and require rotation, and you’ll still need windshield wipers and cabin air filters, but the major service items that cost hundreds of dollars on gas cars simply don’t exist on EVs.

Winter Performance and Battery Longevity

Cold weather does reduce range by 20 to 40 percent depending on how far temperatures drop, but this is a range issue, not a mechanical failure-your EV still starts and drives reliably in winter without the engine block heater or battery maintenance that older electric vehicles required. Battery degradation happens gradually; most EV batteries retain 80 to 90 percent of their original capacity after 200,000 miles of real-world driving. This means your vehicle remains usable for well over a decade even as range gradually decreases. The federal 8-year or 100,000-mile battery warranty covers defects and degradation beyond normal wear, and some manufacturers extend this coverage further, which means manufacturers back their battery technology with real financial commitments if something goes wrong.

Final Thoughts

Deciding whether an electric vehicle makes sense comes down to matching your actual driving patterns against what an EV can realistically deliver. Track your typical daily mileage for a week or two-most people discover their commute is shorter than they thought, which favors EV ownership. If you drive under 200 miles daily and have access to home charging, an EV becomes straightforward, while frequent multi-state road trips require reliable public charging networks and patience for 20 to 45 minute charging stops.

Your living situation shapes the decision more than many realize. Apartment dwellers without dedicated parking face real obstacles that a PHEV solves better than a full battery electric vehicle, while homeowners with garages can install Level 2 charging and capture the full financial advantage. Ask yourself three concrete questions before purchasing: Can you charge at home or work regularly, or will you rely primarily on public networks? Do your typical trips fall within your vehicle’s real-world range, or do you regularly drive beyond 300 miles in a single day? Does your regional electricity cost support the fuel savings this electric vehicle guide emphasizes, or do you live in an area with expensive power that narrows the financial advantage?

The financial case for EVs strengthens when you own the vehicle for seven years or longer and capture both fuel and maintenance savings, though federal tax credits and state incentives shift the equation immediately. We at LifeEventGuide recommend using our Decide-Protect-Execute-Review framework to work through this major purchase decision and keep you focused on what actually matters for your household.


Publisher’s Note: LifeEventGuide is an independent educational publisher. Some articles reference tools or services we recommend to help readers explore options related to major life transitions. Learn more about how we make recommendations here.

How to Maximize Your Trade In Value

Trading in your car is one of the biggest financial decisions in the car-buying process. A proper trade-in value assessment can put thousands of dollars back in your pocket, but most people leave money on the table by not preparing strategically.

At LifeEventGuide, we’ve seen how the right approach transforms a mediocre offer into a strong one. This guide walks you through exactly what dealerships look for and how to position your vehicle for maximum value.

How Trade-In Value Gets Calculated

The Three Core Inputs Dealerships Use

Dealerships calculate trade-in value using three core inputs: your vehicle’s market price, its condition, and local demand. The market price starts with data from Kelley Blue Book, which tracks thousands of sales daily across different regions, mileage ranges, and trim levels. Your specific offer, however, won’t match that number.

Why Dealers Subtract Costs from Market Price

Dealers subtract reconditioning costs-detailing, mechanical repairs, auction fees-and their resale profit margin from the market price. A car needing $1,500 in brake work and interior detailing receives a significantly lower offer than an identical vehicle in pristine condition. This gap explains why two seemingly identical cars can produce vastly different offers at the same dealership.

Mileage and Depreciation Patterns

Mileage stands as the single biggest factor in your trade-in offer. A car with 60,000 miles commands substantially more than the same model at 120,000 miles because depreciation accelerates over time. On average, new cars depreciate about 30% over the first 2 years, then continue to depreciate 8–12% annually after that. This means a newer car with lower mileage will almost always yield a higher trade-in offer than an older vehicle with higher mileage.

How Local Inventory Affects Your Offer

Local demand and inventory levels matter more than most people realize. If your specific vehicle type is scarce at a particular dealership-say, a four-door sedan when they’re overstocked with SUVs-they’ll offer less because they already have similar inventory. Conversely, if that dealership is desperate to fill their lot with sedans, your offer improves. This is why multiple offers from different dealers produce dramatically different numbers for the same car.

Trade-In Versus Private Sale: The Real Trade-Off

A private sale typically yields 10 to 20 percent more than a trade-in because the buyer assumes all reconditioning costs and has no resale margin to protect. However, private sales demand significant time, effort, and risk; you handle advertising, scheduling viewings, managing negotiations, and dealing with payment logistics. A trade-in is faster, simpler, and applies directly to your next purchase, often reducing your down payment and monthly payments. Understanding this trade-off helps you decide whether maximizing raw dollars through a private sale justifies the added complexity, or whether the convenience and tax benefits of a trade-in serve your situation better. With this foundation in mind, the next step is preparing your vehicle to command the strongest possible offer from dealerships.

Getting Your Car Ready for the Appraisal

The weeks before your trade-in appraisal determine whether you walk away with a strong offer or settle for less. Dealerships assess condition in minutes, and that assessment directly reduces or increases their reconditioning costs-which come straight out of your offer. A car requiring $2,000 in detailing and minor repairs receives an offer roughly $2,000 lower than an identical vehicle in pristine condition. This means your preparation directly translates to dollars in your pocket.

Fix Mechanical Issues First

Start with mechanical issues that appraisers flag immediately: worn brake pads, low tire tread, burnt-out lights, and fluid leaks. These aren’t cosmetic concerns; they signal neglect and trigger mandatory repairs that dealerships deduct from your offer. Have a trusted mechanic inspect your vehicle two weeks before the appraisal and fix anything that appears on their report.

Tire tread should measure at least 4/32 of an inch (use the penny test: insert a penny into the tread with Lincoln’s head upside down; if you see the top of his head, replace the tires). Brakes should have at least 3mm of pad remaining. Top off all fluids and address any warning lights on the dashboard. These fixes cost $200 to $800 typically but prevent dealerships from deducting $1,500 or more from your offer.

Invest in Professional Detailing

Professional detailing can recover anywhere from $500 to $2,000 or more in resale value depending on your vehicle’s condition and market. Vacuum the interior thoroughly, including under seats and in crevices where debris accumulates. Clean the engine bay-a grimy engine suggests poor maintenance even if mechanically sound. Polish the exterior to remove oxidation and minor swirl marks.

Address small cosmetic issues strategically: a cracked windshield costs $300 to $400 to replace but dealerships deduct $400 to $600 from offers when present, making replacement worthwhile. Minor paint chips or dents under one inch typically aren’t worth fixing since repair costs exceed the value gained. Remove any aftermarket modifications that deviate from stock appearance; custom wheels, lowered suspensions, or non-factory paint reduce value because dealerships must restore vehicles to standard condition before resale. If you’ve added these modifications, revert to original parts if you still have them.

Organize Your Documentation

Gather all maintenance records, service receipts, and the owner’s manual at least one week before appraisal. A documented service history showing regular oil changes, scheduled maintenance, and repairs signals responsible ownership and supports a higher condition rating. Organize these documents chronologically in a folder to present to the appraiser.

Create a Clean, Neutral Interior

Remove all personal items from the vehicle, including air fresheners, phone chargers, and seat covers. A clean, neutral cabin presents better and prevents the appraiser from noticing interior wear. Wash the windows inside and out, clean the dashboard, and wipe down door panels. These final details take two hours but create the first impression that influences the appraiser’s mindset before they even start their formal evaluation. With your vehicle in peak condition, you’re ready to research what your car actually commands in the current market and approach dealerships with confidence.

Securing the Best Offer Before You Sign

Research Your Vehicle’s Market Value

Knowing what your car is worth in the current market is non-negotiable before you step onto a dealership lot. Pull your vehicle’s estimated trade-in value from Kelley Blue Book by entering your exact year, make, model, trim, mileage, and condition. KBB’s Instant Cash Offer provides a binding seven-day quote redeemable at participating dealers, which gives you a concrete floor for negotiations. Check your car’s value on Edmunds and NADA as well; these three sources rarely align perfectly, but the range they produces shows what dealers are actually paying in your region. The average used-vehicle listing price at the end of 2024 was $25,565 according to KBB data, so understand where your vehicle sits relative to the broader market. Write down the values from all three sources and bring them with you to every dealership.

Collect Multiple Written Offers

Dealers expect negotiation and will often quote below market value initially, so written offers from competing dealerships give you leverage to push back with credibility. Visiting only one dealership is the fastest way to leave thousands on the table. Obtain formal written quotes from at least three different dealers in your area, ideally within the same week so market conditions remain consistent. Dealership offers vary dramatically based on their current inventory needs and reconditioning capacity; one dealer might be overstocked with your vehicle type and offer less, while another desperately needs that exact model and offers significantly more. When dealers provide offers, ask them to itemize what they’re deducting for reconditioning, repairs, and profit margin so you understand their math. If one dealer’s offer is substantially lower than others for the same car in the same condition, ask why and request they match or come closer to competing offers. Dealers have flexibility and will negotiate if they sense you’re serious and have other options.

Negotiate Trade-In and New Car Price Separately

Never accept the first offer, even if it matches your KBB estimate. Separate the trade-in value negotiation from the new car price negotiation completely; dealers often sacrifice trade-in value to secure a better new car sale, or vice versa. Negotiate both independently and then combine them to see your true net benefit. If the dealer won’t negotiate meaningfully or their offer remains substantially below market, walk away. The dealership landscape is competitive enough that you’ll find better terms elsewhere.

Verify Loan Payoff and Final Paperwork

Understanding what you’re actually signing matters as much as the dollar amount. Before you finalize any trade-in, verify that your loan payoff amount matches what the dealership is using to pay off your lender. Request a written payoff quote from your lender and bring it to the dealership so there’s no surprise about how much of your trade-in credit goes to closing your existing loan. If you’re underwater on your loan (meaning you owe more than the trade-in value), understand that negative equity may need to be covered with cash at signing or rolled into your new loan, which increases your payments. Check the paperwork for the trade-in value one final time before signing; dealerships sometimes adjust offers downward after appraisal if they discover undisclosed damage or maintenance issues, so inspect their final offer against what was verbally promised. Confirm that any tax benefits apply in your state; many states let you deduct the trade-in value from the taxable price of your new vehicle, which can save hundreds in sales tax. Ensure all keys, remotes, the owner’s manual, and your title are ready to hand over at signing. Take photos of your vehicle’s odometer and overall condition on the day of trade-in as documentation of the condition you presented. Once you sign the trade-in paperwork, the deal is final and disputes become extremely difficult to resolve, so verify every detail before initialing anything.

Final Thoughts

Maximizing your trade-in value assessment requires three core actions: preparing your vehicle thoroughly, researching what it’s actually worth, and negotiating with confidence. Professional detailing, a mechanical inspection, and organized service records add hundreds or even thousands to your offer. Knowing your car’s value from Kelley Blue Book, Edmunds, and NADA before you walk into a dealership prevents you from accepting lowball offers out of uncertainty.

The most common mistakes occur when people skip preparation, rely on a single dealer’s offer, or fail to verify their loan payoff amount before signing. Dealers expect negotiation and will adjust their offers if you present competing quotes and evidence of your vehicle’s market value. Walking away from an unfair offer is always an option; the dealership landscape is competitive enough that you’ll find better terms elsewhere.

We at LifeEventGuide understand that major life transitions like buying a car involve multiple moving parts and decisions. Our event-specific checklists and guidance help you navigate the entire car-buying process calmly and confidently, from setting your budget to closing the deal. Take the time to prepare your vehicle, know your numbers, and negotiate firmly.


Publisher’s Note: LifeEventGuide is an independent educational publisher. Some articles reference tools or services we recommend to help readers explore options related to major life transitions. Learn more about how we make recommendations here.

What Coverage Do New Car Owners Need

Buying your first car is exciting, but the insurance part often feels overwhelming. At LifeEventGuide, we know that picking the right coverage is one of the most important decisions you’ll make as a new car owner.

This guide walks you through the types of coverage available, how to assess what you actually need, and the mistakes to avoid. Whether you’re doing a car insurance comparison or just trying to understand your options, we’ll help you find the right protection for your situation.

What Each Coverage Type Actually Protects

Liability Coverage: Your Legal Foundation

Liability coverage is mandatory in nearly every state, and it forms the foundation of any car insurance policy. This coverage pays for injuries and property damage you cause to other people and their vehicles, up to your policy limits. Most states set minimum liability requirements, but these minimums are dangerously low-requirements vary from less than $100 to well over $100,000 depending on the state.

If you cause significant injuries, the injured party can sue you personally for amounts far exceeding your policy limits, putting your wages and assets at risk. We strongly recommend choosing liability limits of at least $100,000 per person and $300,000 per accident, even if your state allows lower minimums. The cost difference between minimum coverage and these higher limits is usually just $20 to $40 per year, making it one of the smartest financial decisions you can make.

Collision and Comprehensive: Protecting Your Vehicle

Collision and comprehensive coverage protect your own vehicle, which is why most lenders require them if you finance or lease a car. Collision pays for damage when you hit another vehicle or object, while comprehensive covers theft, weather, vandalism, and other non-collision events. These coverages come with deductibles, typically ranging from $250 to $1,000, and lenders often mandate that your deductible not exceed $500.

New cars cost significantly more to insure than used cars because repair costs are higher and theft risk is greater. Skipping these coverages is risky if you cannot replace your vehicle out of pocket. When shopping for quotes, request separate pricing for liability, collision, and comprehensive so you can see exactly what each component costs.

Uninsured and Underinsured Motorist Coverage

Uninsured and underinsured motorist coverage protects you when someone else causes an accident but has little or no insurance. About half of all states require UM/UIM coverage, but it’s worth adding even if your state doesn’t mandate it. Without it, you could face mounting medical bills and vehicle repairs with no way to recover costs if the at-fault driver is uninsured.

These different coverage types work together to create a complete protection plan. The next step is figuring out which combination actually fits your specific situation-something that depends on your finances, your state’s rules, and what you’re driving.

How Much Coverage Do You Actually Need

State Minimums Fall Short of Real Protection

The gap between what your state requires and what actually protects you financially is where most new car owners stumble. State minimum liability requirements exist in nearly every state, but they’re often shockingly low-some states allow as little as $25,000 in bodily injury coverage per person, which barely covers a single emergency room visit. If you cause a serious accident, the injured party can pursue a personal lawsuit against you for amounts far beyond your policy limits, potentially claiming your wages and assets for years.

Building Financial Protection Through Higher Limits

Your financial situation determines how much risk you can absorb if something goes wrong. If you have savings, a home, or income you want to protect, carrying higher liability limits becomes essential rather than optional. We recommend at least $100,000 per person and $300,000 per accident in liability coverage regardless of your state’s minimums, and the annual cost difference is typically $20 to $40 compared to minimum coverage.

Evaluating Collision and Comprehensive Against Vehicle Value

For collision and comprehensive coverage, the math is straightforward: compare your vehicle’s replacement value against the annual cost of adding these coverages. If your car is worth $30,000 and collision and comprehensive would cost $800 per year with a $500 deductible, that coverage pays for itself in about four years of accident-free driving. New cars cost more to insure than used cars because repair costs run higher and theft risk is greater, so a 2022 Honda hybrid financed at $24,500 with a 72-month loan at 3.68% APR means your lender will require collision and comprehensive anyway. Your lender controls your deductible options-most require deductibles no higher than $500-so verify what your lender mandates before you shop for quotes.

Matching Coverage to Your Ownership Situation

If you’re financing or leasing, your lender’s requirements simplify the decision: you must carry what they require, typically full coverage meaning liability plus collision and comprehensive. If you own your vehicle outright, the choice depends entirely on whether you could replace it out of pocket if it’s totaled. Uninsured and underinsured motorist coverage protects you when someone else causes the accident but carries inadequate insurance, and about half of all states require it. Even in states where it’s optional, adding UM/UIM coverage costs relatively little and protects you from medical bills and repair costs you cannot recover from an underinsured driver.

Getting Quotes That Show Real Costs

When you get quotes online or speak with a licensed representative, request separate pricing for liability, collision, and comprehensive so you see exactly what each component costs. This transparency helps you understand where your money goes and whether bundling your auto policy with home or renters insurance makes sense-bundling typically saves about 5% on auto premiums in most states. Getting personalized quotes that show how liability, collision, and comprehensive distribute across different deductible options allows you to match those costs against your actual financial capacity to handle a loss. This information becomes your foundation for making the coverage decisions that protect both your vehicle and your financial future.

Mistakes That Cost New Car Owners Thousands

Underinsuring Liability Coverage to Save a Few Dollars

The most expensive mistake new car owners make is selecting minimum liability coverage to save money upfront, then facing financial devastation when an accident happens. State minimums exist in nearly every state, but they fail to protect you financially in real-world accidents. A single serious injury can generate medical bills exceeding $100,000, and if you’re at fault, the injured party can sue you personally for amounts far beyond your policy limits. Selecting $25,000 in bodily injury coverage to save $30 per year virtually guarantees you’ll be personally liable for the difference. The cost gap between minimum coverage and reasonable protection is negligible-typically $20 to $40 annually-yet new car owners routinely accept this risk without understanding it.

Your liability limits should reach at least $100,000 per person and $300,000 per accident regardless of your state’s requirements, because the financial consequences of being underinsured far outweigh the premium savings. This protection matters most when you cause serious injuries or significant property damage. The injured party will pursue every legal avenue to recover costs, and your personal assets become vulnerable if your policy limits fall short.

Purchasing Coverage Without Understanding What It Actually Covers

Many new car owners believe their liability coverage protects their own injuries and vehicle damage, then face shocking denials when filing claims. Liability pays only for injuries and damage you cause to others-it covers nothing for you or your passengers. If you want medical coverage for yourself, you need medical payments coverage or personal injury protection depending on your state. Collision covers your car when you hit something; comprehensive covers theft, weather, and vandalism. These distinctions matter enormously when you’re injured or your vehicle is damaged.

Before you finalize any policy, contact your insurer directly and confirm exactly what is and isn’t covered, particularly regarding medical expenses and vehicle damage. Many lenders require specific deductible levels-typically $500 or lower for collision and comprehensive-so verify your lender’s requirements match your policy before you drive off the lot. Taking time to read your policy documents prevents costly surprises later.

Ignoring Coverage Changes as Your Situation Evolves

New car owners obtain a quote, purchase coverage, then never revisit it for years. Your coverage needs change as your vehicle ages, your financial situation shifts, and your state’s requirements evolve. A car worth $30,000 when new may be worth $15,000 after five years, making collision and comprehensive less critical financially. Conversely, as you build equity and assets, carrying only minimum liability becomes increasingly reckless.

Review your coverage annually or whenever your life circumstances change-after a promotion, when you pay off your loan, or when your vehicle ages significantly. This habit prevents you from overpaying for unnecessary coverage or remaining dangerously underinsured as your financial picture improves.

Final Thoughts

Choosing the right car insurance as a new owner comes down to three core decisions: carrying liability limits that actually protect your assets, understanding what each coverage type covers and doesn’t cover, and reviewing your policy regularly as your situation changes. Liability coverage is non-negotiable and legally required, but state minimums leave you financially exposed-carrying at least $100,000 per person and $300,000 per accident costs only $20 to $40 more annually and shields your wages and assets from lawsuits. Collision and comprehensive protect your vehicle itself, and if you’re financing your car, your lender will require them anyway with deductibles typically capped at $500.

When you conduct a car insurance comparison, request separate quotes showing liability, collision, and comprehensive costs so you see exactly where your money goes. Bundling your auto policy with home or renters insurance typically saves about 5% on premiums, making it worth exploring. Your financial situation, your vehicle’s value, and your state’s specific requirements all shape what makes sense for you-there’s no one-size-fits-all answer, which is why personalized quotes matter more than generic advice.

The biggest mistake new car owners make is treating insurance as a one-time purchase rather than an ongoing decision. Review your coverage annually, especially when your vehicle ages, your financial situation improves, or your life circumstances shift. We at LifeEventGuide help people navigate major life transitions like buying a car by providing clear frameworks and resources that reduce risk and prevent costly mistakes-explore our publisher recommendations to find tools and services that support your car-buying journey from start to finish.


Publisher’s Note: LifeEventGuide is an independent educational publisher. Some articles reference tools or services we recommend to help readers explore options related to major life transitions. Learn more about how we make recommendations here.

Why Your First Offer Rarely Wins [Guide]

Your first offer almost never succeeds. Whether you’re buying a home, a car, or negotiating any major purchase, sellers anticipate pushback and price accordingly.

At LifeEventGuide, we’ve seen how understanding this dynamic changes everything. This guide walks you through why initial offers fail, what car negotiation tactics actually work, and how to position yourself for success in multiple rounds of offers.

Why Sellers Reject Initial Offers

Sellers price with negotiation in mind from day one. Listing agents anchor prices higher than comparable market data suggests, knowing buyers will counter lower. This isn’t accidental-it’s deliberate. A seller listing a home at $400,000 often expects your opening bid to land around $380,000 to $390,000. They’ve already factored in your pushback. When you submit that first offer, you step into a negotiation framework the seller has already constructed. The National Association of Realtors reports that first offers succeed in fewer than 20 percent of transactions, and that acceptance rate drops further in competitive markets where multiple bids arrive simultaneously.

Your First Offer Reveals More Than Price

Your first offer serves another purpose beyond the actual price-it signals how serious you are and what information you lack. Sellers and their agents read your offer like a diagnostic report. If you waive the inspection contingency but include a financing contingency, they see uncertainty about your funding. If you offer 10 percent above asking without comps to justify it, they recognize you’re guessing rather than calculating. If you submit a lowball first bid and then jump $30,000 on your second offer, they know you have more room to move. Each reveal weakens your position for round two and beyond. A seller who understands your maximum budget will simply wait for you to reach it rather than accept your first number. This is why real estate agents often advise clients to submit stronger second offers than first ones-because the first offer always contains incomplete information on both sides.

Market Data Exposes the Pattern

In competitive markets, homes with multiple offers close above asking price on average. Those homes rarely accept the first bid. Instead, sellers trigger a highest-and-best deadline, forcing buyers into their actual price range. In slower markets where homes sit longer, acceptance rates for first offers climb slightly because sellers grow more motivated. But even then, first offers that succeed tend to include terms that matter more than price-flexible closing dates, reduced contingencies, or a larger earnest money deposit. The data reveals a pattern: first offers that win do so because they demonstrate serious intent through terms and verification, not because the number itself is acceptable.

What Actually Moves Sellers to Accept

A pre-approval letter from a reputable lender, proof of funds, and minimal contingencies signal you’re a credible buyer ready to close. Without those elements, your price becomes just a conversation starter, not an offer the seller considers final. The strongest first offers combine three elements: a competitive price backed by comparable sales data, terms that address the seller’s specific situation (speed, certainty, flexibility), and documentation that proves you can actually close. This combination shifts the conversation from “Is this number high enough?” to “Can this buyer actually deliver?” Understanding what motivates your specific seller-whether they need a quick close, want certainty, or have timing constraints-allows you to craft an offer that stands out not because it’s the highest, but because it solves their actual problem. This foundation of knowledge and credibility sets you up to negotiate effectively when the seller counters.

How to Research and Time Your Offer for Maximum Impact

Build Your Offer on Comparable Sales Data

Comparable sales data forms your foundation, not a suggestion. Pull sales from the past 30 to 90 days for properties within a quarter-mile radius that closed within the last three months-not listings, actual closed sales. Research and statistics from industry sources show that agents using MLS comparables to justify pricing win more negotiations than those relying on intuition. Compare square footage, condition, lot size, and sale date. A home that sold six months ago in a declining market holds no value as a comp. A home that sold two weeks ago in similar condition becomes your benchmark. Calculate the price per square foot and multiply by your target property’s size, then adjust upward or downward based on condition differences. This number becomes your ceiling, not your starting point.

If comps show homes selling at $350 per square foot and your target property is 2,000 square feet, that’s a $700,000 property before adjustments. A listing at $750,000 tells you the seller has priced with significant negotiation room built in. Your first offer lands closer to $700,000 to $710,000, backed by data rather than hope. This approach removes emotion from your bid and gives you credibility when the seller counters.

Understand the Seller’s Timeline and Motivation

Timing your offer requires understanding the seller’s calendar, not the market’s. A seller who already purchased their next home carries two mortgages and will accept less to close quickly-offer a 21-day close instead of 30 and watch acceptance rates climb. A seller listing in winter faces fewer buyers, making them more flexible on terms even if price stays firm. A property listed for more than 90 days signals motivation, and sellers of stale listings negotiate harder on contingencies and closing costs than on price alone.

Conversely, a property that hit the market 48 hours ago in a hot neighborhood will reject your first offer outright because competing bids are incoming. Research the listing date, property tax records showing previous sales, and any agent notes about the seller’s situation. Ask your agent directly: Does the seller need to close by a specific date? Have they already bought elsewhere? Are they relocating for work with a firm deadline? This intelligence transforms your offer from generic to surgical.

Match Your Terms to What the Seller Actually Needs

A contingency-light offer with a quick close to a seller under time pressure wins far more often than a higher price with a 45-day close. Reduce your inspection period to 7 days instead of 10, offer a 24-hour option period, or agree to minimal appraisal gaps-these terms cost you nothing but signal you’re a serious buyer ready to move. The seller doesn’t care that your price is $5,000 higher if you solve their actual problem: certainty and speed.

When you align your offer terms with the seller’s specific situation (rather than submitting a standard template), you shift the conversation from “Is this number high enough?” to “Can this buyer actually deliver?” This positioning matters far more in round two of negotiations, where sellers evaluate not just price but which buyer removes the most risk from their transaction. Your research into comparable sales and seller motivation now becomes your leverage in the back-and-forth that follows.

Mistakes That Sink Your Negotiating Position

Revealing your maximum budget to a seller or their agent hands them your negotiating ceiling on a platter. If you mention during conversation that you’re approved for $500,000 or that you have $50,000 to put down, that information travels directly to the listing side. A seller who knows your upper limit stops negotiating at $485,000 instead of dropping to $460,000. Your first offer becomes irrelevant because the seller already knows exactly where you’ll eventually land.

The same applies to timeline pressure. Stating you need to close in 20 days because your lease ends signals desperation, and sellers exploit desperation ruthlessly. They’ll hold firm on price knowing you have no alternative. Instead, keep your financial ceiling and closing timeline private. Share only what strengthens your offer: your pre-approval amount (which proves you can finance), your earnest money deposit (which shows commitment), and your flexibility on closing dates that benefit them. Your agent should never volunteer information about your budget or timeline unless it directly supports your negotiating position.

The Contingency Trap

Inspection and appraisal contingencies protect you, but they also signal uncertainty to the seller. A buyer who includes both contingencies plus a financing contingency appears to lack confidence in their ability to close. Sellers read this as negotiating leverage for themselves. In competitive markets, buyers who waive the appraisal contingency or limit inspection periods to 7 days instead of 14 win more often than those stacking protections.

This doesn’t mean skipping inspections entirely-that’s reckless. Schedule your inspection before you submit your offer and identify issues upfront. Then remove the contingency from your bid because you already know the property’s condition. You pay $400 to $600 for a pre-offer inspection and gain the ability to submit a contingency-free offer that stands out. Similarly, if you have strong financing and the appraisal comes in low, offer to cover appraisal gaps up to a specific amount. A gap guarantee of $10,000 costs you nothing if the appraisal hits value, but it eliminates the seller’s fear that you’ll walk away mid-transaction. These moves position you as a buyer who removes risk rather than creates it.

Understanding What Actually Motivates Your Seller

Sellers have different priorities, and most first offers fail because buyers ignore those priorities entirely. A seller who already closed on their new home prioritizes speed over price-they’re bleeding money on two mortgages. Offer a 21-day close at $5,000 less than your maximum, and they accept. A seller who listed in a declining market prioritizes certainty-they want to know the deal won’t fall apart. Reduce contingencies and increase earnest money, and price becomes secondary.

A seller whose property sat on market for 120 days prioritizes closure, period. They’ll negotiate harder on inspection terms and closing costs than on price because they need the transaction to finish. Your agent should ask the listing agent directly about seller motivation. Not as a negotiating tactic, but as intelligence gathering. Is the seller relocating with a firm date? Have they already purchased elsewhere? Are they dealing with an estate timeline? These answers transform your offer from generic to surgical. A first offer that addresses the seller’s actual problem succeeds far more often than one that only increases the price by $10,000. You’re not trying to win an auction-you’re trying to solve their specific situation before competing bids even arrive.

Final Thoughts

Your first offer succeeds when it demonstrates you’re a serious buyer ready to close, not when it’s the highest number on the table. Everything you’ve learned here-researching comparable sales, understanding seller motivation, timing your bid, and structuring terms that solve the seller’s actual problem-builds credibility. A seller who sees pre-approval documentation, minimal contingencies, and terms aligned with their timeline views your offer as a genuine path to closing, not an opening negotiation position. Whether you apply car negotiation tactics to a vehicle purchase or navigate a home sale, the principle remains the same: information and credibility matter more than a single number.

Preparation and market knowledge give you real leverage. Buyers who arrive with comparable sales data, knowledge of the seller’s situation, and realistic pricing win negotiations faster than those who guess. Expect multiple rounds of offers as part of the normal process-the seller will counter, you’ll adjust, and the negotiation will move toward a middle ground where both sides feel they’ve won something. This back-and-forth isn’t failure; it’s how transactions actually work.

Your second and third offers, informed by the seller’s feedback and your deeper understanding of their priorities, position you far better than any first bid ever could. We at LifeEventGuide created resources to help you navigate major purchases with confidence through structured planning that removes stress from negotiation. Visit our resources for major life decisions to explore how clear frameworks help you close with certainty.


Publisher’s Note: LifeEventGuide is an independent educational publisher. Some articles reference tools or services we recommend to help readers explore options related to major life transitions. Learn more about how we make recommendations here.

How to Spot Hidden Problems in Used Vehicles

Buying a used car is one of the biggest purchases you’ll make, yet many buyers skip the thorough inspection that could save them thousands in repairs. Hidden problems like engine damage, frame issues, and water intrusion don’t always show up at first glance.

At LifeEventGuide, we’ve seen too many people regret their purchase because they rushed through the used car inspection process. This guide walks you through exactly what to look for and how to protect yourself before signing on the dotted line.

What Hidden Problems Cost the Most to Fix

Engine and Transmission Failures

Engine and transmission failures represent the most expensive repairs you’ll face after buying a used car. A transmission rebuild costs vary significantly depending on your vehicle’s make and model, while engine problems like worn pistons or valve damage can easily exceed $5,000. Listen carefully at startup for knocking or ticking sounds, which signal internal engine wear. Watch the exhaust at startup and during acceleration-blue smoke means the engine is burning oil, a sign of worn rings or valve seals.

During the test drive, pay close attention to how the transmission shifts. Rough or delayed shifts, slipping between gears, or hesitation during acceleration indicate transmission trouble. If the car has a CVT transmission, ask specifically about its service history since some models from Honda and Nissan have documented transmission failures that dealers have quietly repaired under extended warranties.

Frame Damage and Structural Problems

Frame damage and structural problems are equally expensive and dangerous. When a vehicle has been in a serious accident, even repairs that look cosmetic can hide deeper issues affecting safety and handling. Check for misaligned door and panel gaps by running your hand along the body lines-consistent gaps mean the panels are original, while uneven gaps suggest repainting and potential frame work. Inspect the undercarriage closely for rust patterns, welding marks, or patches that indicate frame straightening.

Flood Damage and Water Intrusion

Flood damage creates problems that emerge months after purchase, from corroded wiring to engine seizure. A musty odor inside the cabin, water stains on carpets or upholstery, and corrosion on electrical connectors under the hood are clear indicators. Flood-damaged vehicles face significant risks from water damage and corrosion.

Obtain a vehicle history report from Carfax or AutoCheck before inspecting any car-these reports flag branded titles like salvage or rebuilt status that directly correlate with hidden mechanical issues and lower insurance coverage. The small cost of a history report prevents far larger losses down the road. With these costly problems in mind, knowing how to spot them during your inspection becomes your best defense against expensive surprises.

How to Inspect a Used Car the Right Way

Gather Information Before You Arrive

Start your inspection before you arrive at the seller’s location. Pull the vehicle history report from Carfax or AutoCheck and scan for branded titles, accident records, flood damage flags, and odometer discrepancies. NHTSA data shows odometer fraud remains a persistent problem, so cross-reference the mileage against service records and the title. Check the NHTSA recall database using the specific VIN to see what safety campaigns apply and whether the seller completed them. A clean history report doesn’t guarantee the car is problem-free, but it eliminates entire categories of risk and gives you specific areas to focus on during your hands-on inspection.

Use Diagnostic Tools and Visual Checks

Bring an OBD-II scan tool to the vehicle and plug it in before anything else-this pulls diagnostic codes that reveal hidden engine problems the seller may not know about or won’t mention. Look at the readiness monitors to see if recent repair work was done improperly or if sensors are disconnected. During your visual inspection, examine the exterior paint carefully for overspray, color inconsistencies, or areas where the finish looks rougher than surrounding panels (all signs of repainting after accident damage). Run your hand along panel gaps from the hood to the trunk-original gaps are consistent and even, while misaligned gaps suggest frame work. Check the undercarriage by getting underneath or using a flashlight to inspect suspension mounts, frame rails, and welds for rust patterns, straightening marks, or welding that looks newer than the rest of the car. Inspect all four tires for uneven wear, which points directly to suspension problems or misalignment that you’ll pay to fix later.

Conduct a Thorough Test Drive

Test the car’s performance during a 20-minute drive that covers city streets, highways, and at least one hard stop. Listen for engine knocking, ticking, or pinging during acceleration-these sounds indicate worn internal components. Watch the transmission behavior across all gear changes and note any hesitation, rough shifting, or slipping. Feel the brakes for firmness and consistency; a soft or spongy pedal suggests air in the lines or worn components. Check for fluid leaks by looking under the engine after the test drive when it’s still warm.

Hire a Professional Mechanic

Professional pre-purchase inspections from an ASE-certified mechanic ensure you know exactly what you’re buying and reduce the risk of unexpected repair costs-this is the single best investment you can make before buying. A qualified mechanic will evaluate engine compression, transmission fluid condition, suspension wear, brake system integrity, and electrical faults with specialized equipment. Get the inspection report in writing and use it to either negotiate the price down or walk away if repair costs exceed your budget. Don’t rely on seller claims about maintenance history; request all service records with dates and mileage, and verify major work like timing belt replacement or transmission service actually happened at legitimate shops.

With a complete picture of the vehicle’s condition in hand, you’re ready to make an informed decision about whether this car is worth your money-or whether you should keep looking.

What to Do When You Find Problems

Evaluate Repair Costs Against Market Value

Once your mechanic’s report arrives, you face the hardest decision in the buying process: do you negotiate, walk away, or accept the car as-is? The answer depends entirely on repair costs relative to the asking price and your risk tolerance. If the inspection uncovers a $3,000 transmission issue on a $12,000 car, you’re looking at a 25% price correction-far steeper than most sellers will accept. In this scenario, walking away often makes more financial sense than negotiating. However, if the report flags a $600 brake pad replacement or a $400 serpentine belt, these are maintenance items you’d expect on any used vehicle, and negotiating $800 off the price is entirely reasonable.

The key metric is comparing total repair costs against the vehicle’s market value using Kelley Blue Book or Edmunds. If repairs exceed 20% of the car’s value, the deal becomes economically risky regardless of how much you like the vehicle.

Negotiate Based on Multiple Repair Quotes

Sellers rarely accept full repair costs as a price reduction-expect negotiations to land at 50-70% of the mechanic’s estimate, since they assume you’ll use cheaper aftermarket parts or handle some work yourself. You should obtain multiple repair quotes from independent shops in your area before negotiating; a timing belt replacement might cost $800 at a dealership but $450 at an independent shop, and sellers know this gap exists. These quotes give you concrete leverage during price discussions and prevent sellers from dismissing your requests as unreasonable.

Document Everything in Writing

You must document everything in writing during negotiations, including which specific repairs you’re requesting as price reductions and the exact dollar amounts. Once you agree on a final price that accounts for necessary repairs, finalize the purchase through a bill of sale that references the agreed-upon inspection findings and price adjustment. This written record protects you legally if disputes arise after the sale. Some states require specific disclosures about known defects, so confirm your local regulations before signing anything. Don’t accept vague answers about past repairs or water damage-ask for documentation and verify that problems were actually fixed, not just covered up.

Use the Inspection Report as Your Foundation

The inspection report becomes your most valuable document-it justifies your negotiated price to your lender, provides evidence if the seller misrepresented the vehicle’s condition, and gives you a baseline for future maintenance decisions once you own the car.

Final Thoughts

Spotting hidden problems in a used car requires patience, skepticism, and a willingness to walk away from deals that don’t add up. The used car inspection process we’ve outlined-pulling vehicle history reports, using diagnostic tools, conducting test drives, and hiring a professional mechanic-protects you from expensive surprises. Every step filters out risk and gives you concrete information to make decisions with confidence.

Most hidden problems emerge because buyers skip one or more of these steps. They trust the seller’s word about maintenance history, they skip the professional inspection to save $150, or they ignore warning signs during the test drive because they’ve already fallen in love with the car. These shortcuts consistently lead to expensive repairs within months of purchase, so document your findings in writing, obtain multiple repair quotes, and use that data to negotiate fairly or decide to keep looking.

If repair costs exceed 20% of the vehicle’s market value, the math simply doesn’t work in your favor, no matter how much you want the car. At LifeEventGuide, we offer checklists and guidance specifically for car purchases to help you avoid common mistakes and complete this transition calmly. The investment you make in thorough inspection now pays dividends for years through reliable transportation and peace of mind.


Publisher’s Note: LifeEventGuide is an independent educational publisher. Some articles reference tools or services we recommend to help readers explore options related to major life transitions. Learn more about how we make recommendations here.